
Fiber connectors may be tiny, but a single speck of dust on them can bring an entire network—possibly your business—to a grinding halt. Ever wondered why your blazing-fast internet suddenly feels like dial-up, despite that shiny new fiber link? If you’ve dealt with mysterious slowdowns or connectivity drops, contaminated connectors are likely the silent culprit. The good news? A little routine cleaning and maintenance can keep your fiber connections crystal clear. In this guide, we’ll take you through the step-by-step process of cleaning and maintaining fiber connectors, ensuring maximum uptime and stellar network performance.
Why Clean Fiber Connectors Matter
Fiber connector end-faces are highly sensitive. Even microscopic particles can scatter or absorb the light signal, causing increased attenuation, signal loss, or even permanent damage. Studies show that up to 85% of network failures in fiber links are due to dirty or damaged connectors, according to industry standards cited by reputable sources like Cisco and Fluke Networks. If you’re managing critical infrastructure—think data centers, telecom, or manufacturing—regular maintenance isn’t optional; it’s your first line of defense against costly downtime.
Signs Your Fiber Connectors Need Cleaning
- Inexplicable signal loss or attenuation.
- Increased network errors or latency.
- Frequent need to reseat or reboot equipment.
- Visible dirt or debris on connector end-faces under inspection.
If any of these sound familiar, it’s time to up your connector-care game.
What You’ll Need: Toolkit for Fiber Cleaning
Before rolling up your sleeves, gather the right supplies—using the wrong tools can do more harm than good!
- Lint-free wipes
- Isopropyl alcohol (99% or specially formulated fiber optic cleaning solution)
- Specialized fiber cleaning pens or swabs
- Canned, filtered, non-residue air (optional)
- Inspection scope (handheld microscope recommended)
- Protective caps (for unused connectors)
- Fiber optic cleaning kit (like those found at reputable electronics suppliers)

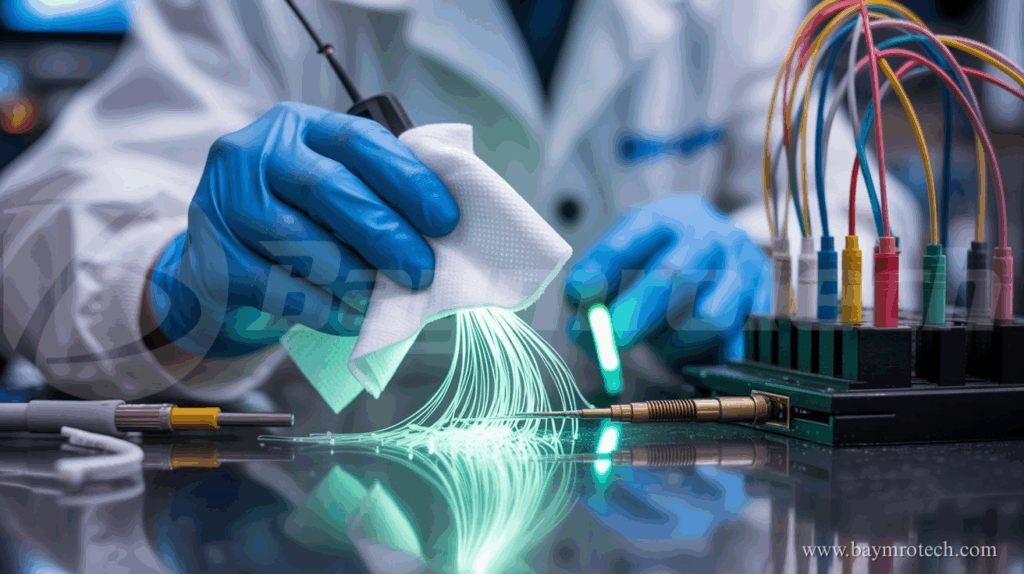
Step-by-Step Fiber Connector Cleaning Guide
Let’s break it down. Here’s how to get those connectors sparkling clean and performing at their best:
1. Power Down and Disconnect
- Always switch off laser sources and disconnect equipment before cleaning. Safety first! Some signals are invisible and can seriously damage your eyes or equipment.
- Remove protective caps only when ready to clean and reconnect.
2. Inspect Before You Touch
- Use a fiber inspection microscope to check the connector end-face.
- Look for dust, fingerprints, or scratches. Only clean what you can see—over-cleaning worn connectors can do more harm than good.
3. The Combination Cleaning Method (Best Practice)
- Lightly moisten a folded, lint-free wipe with cleaning solution. Don’t soak it—just dampen!
- Gently press and rotate the fiber connector on the wipe for several turns.
- Immediately move to a dry, clean section of the wipe, drawing the connector end-face in one direction to remove any remaining residue.
- Never use circular or twisting motions; this can spread dirt and grind particles into the end-face.
4. Swab for Ports or Inside Cleaning
- If contamination is inside an adapter or port, use a dampened cleaning swab.
- Insert the swab, press gently, and rotate several times.
- Finish with a dry swab, or blow away any residue with compressed air.
5. Inspect Again
- Re-inspect with your microscope. If any contamination is visible, repeat the cleaning process.
- Clean until you achieve a spotless, scratch-free end-face.
6. Reconnect and Cap
- Only reconnect clean connectors. Dirty ports will instantly transfer grime to your freshly cleaned connector.
- Always use protective caps to shield unplugged connectors—and store those caps in a clean container.
Maintenance Tips for Reliable Performance
Routine care is the key to keeping your network running smoothly. Integrate these habits into your maintenance routine:
- Clean every connector before you connect.
- Inspect and test fiber links regularly. Use an optical power meter to verify performance.
- Store cleaning materials in dust-free containers.
- Keep your work area—and your hands—clean.
- Replace damaged or worn connectors promptly; no amount of cleaning will fix scratches or cracks.
Maximizing the Life of Copper Fiber Composite Cable
If your network uses copper fiber composite cable, you get the best of both worlds: power and data in a single rugged sheath. But these hybrid cables still require regular TLC. Inspect for signs of physical damage: kinks, bends, or compromised insulation. Schedule periodic continuity and signal quality checks to troubleshoot issues before they lead to network outages. For extra guidance, check out our in-depth article on composite cable applications right here on BaymroTech: Explore Copper Fiber Composite Cable Solutions.
Common Mistakes to Avoid
- Don’t use “household” wipes or tissues—they can leave fibers or debris behind.
- Never skip inspection before and after cleaning; guesswork leads to problems.
- Avoid harsh chemicals or excessive pressure—these can damage delicate connector surfaces.
- Don’t substitute protective caps with makeshift covers (like tape); they can introduce more dirt.
Expert Opinions and Industry Stats
According to a recent EXFO white paper, nearly 80% of installers confess to “rushing through” cleaning steps due to tight deadlines—yet poor cleaning is the top reason for early system failures. As Fluke Networks points out, regular maintenance reduces troubleshooting costs and can add years to your network’s life. Even a quick “inspect-clean-inspect” routine makes a measurable difference in throughput and reliability.
Want more fiber maintenance hacks? Dive deeper with our Practical Guide to Fiber Optic Cable Management, packed with actionable tips from the BaymroTech team.
Learn More from the Experts
If you’re hungry for hands-on tutorials, industry leaders like EXFO’s full fiber care guide and the Cisco Fiber Optic Inspection guidelines offer expert breakdowns on cleaning techniques and connector maintenance.
Conclusion & Call to Action
Maintaining clean fiber connectors isn’t rocket science—it just takes the right approach and a little consistency. By following these steps, you’ll keep your network fast, reliable, and future-proof. Ready for more pro tips or have a story to share? Drop a comment below, explore our expert guides, or contact BaymroTech’s electric division for personalized advice and the best cleaning tools. Don’t let a dusty connector slow you down—your uptime is worth the effort!


